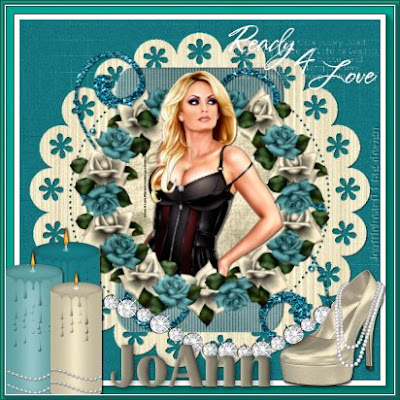
 Tutorial by Jcuttlebear01 aka JoAnn
9/10/2009
I do these tutorials for fun and not
for any profit. I use them also as a learning tool to
help others learn the fun and art of paint shop pro.
Supplies needed
Scrapbook kit can be found HERE
Called Diamond Blues it's a free scrapbook kit.
http://www.scrapsdimensions-dorisnilsa.blogspot.com/
All is the work of Doris of Scrappy Dimensions
Template I used is HERE
#13
Tube is from My PSP Tubes.com
Here
http://www.mypsptubes.com/
 PSP 9
PSP 9Plug in used.
AAA Foto frame here
Open your PSP
Find the things your going to use
for this tutorial.
Once you have done that your
ready to go.
1. Open the template and duplicate it and close the original.
2. Delete the all layers except for the 4 bottom ones.
These are the only ones we will be working with.
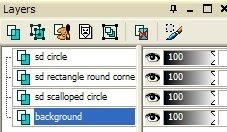
3. Open a paper that you wish to use on the
scalloped circle layer, activate it and copy and
Paste the paper of choice into the selection.
I used paper 3.
Selection and none.
4. Add a drop shadow to this layer.
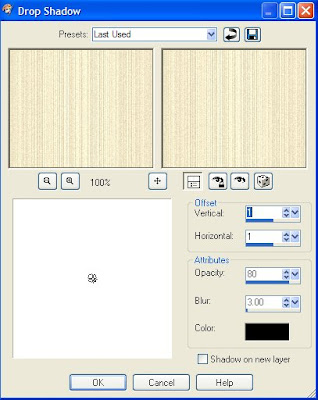
5. Activate the next layer and select it.
Find another paper and copy and paste it into
the selection. I used paper 5, the deselect.
6. Effects 3d and inner bevel.
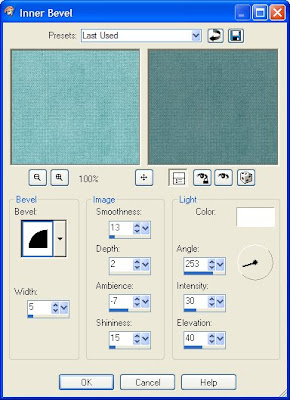
7. Effects texture effects, I used these settings.
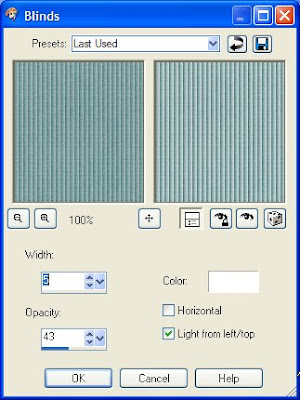
8.. Activate the circle layer and find a paper
that you want to use, and copy and paste it
into the selection.
I used paper 9
Keep Selected
9. Find the tube you wish you use
and copy and paste it as a new layer.
Move it to where you want it,
Then go selection, and invert and delete
one time. then deselect.
10. Get the rose wreath and re size it
60 percent, make sure that all layers is not check.
Then copy and paste it to your work as a new layer.
This is what it will look like now.
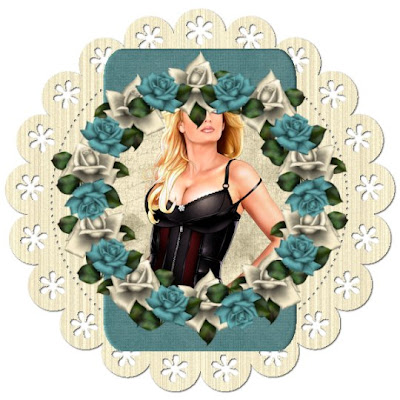
11. Get your eraser tool, your going to remove the part
of the wreath that is over her face, and arm.
 Hint.......
If you lower the opacity on the wreath layer it makes it easy to see where
your wanting to take off.
If you goof and take off to much don't worry remember edit undo.
You don't need to start over with it.
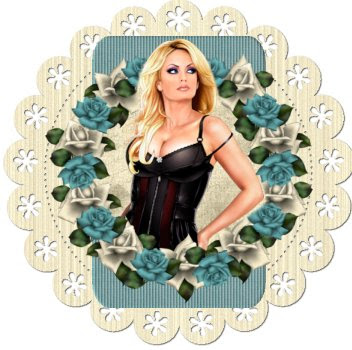
12. Add the same drop shadow you used before to
the tube layer.
If your happy with the way everything looks
your ready to add some accents now.
13. Find a glitter doodle you wish to use,
I used doodle 2 re size it 60 percent and
copy and paste it to your work.
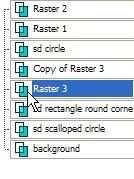 14. Move that layer just above the square layer,
get your mover tool and place how you want it,
Add same drop shadow as before.
15. Then duplicate layer and mirror and flip it.
16. Once your happy with the way everything looks.
Close off the background layer, and merge all layers.
17. Re size this layer to your liking, I went to 90 percent.
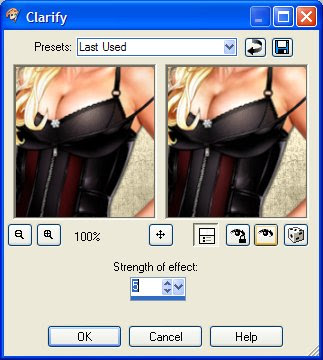
Adjust and brightness and contract by 5.
18. Add a new raster layer.
Move it below the merge layer.
Selection and all
find a paper you want to use for the background.
I used paper 1 from the kit.
Deselect
19. Re size to your liking
I went to 400 Pixels.
Check all layers.
Next I added
AAA Foto frame
20. I then added the diamond accents didn't re size them.
You will need to cut off what you don't want showing on the tag.
22. Next I added the candles and re sized them by 25 percent.
And the shoe by 15 percent.
I added the same drop shadow to all my accents
except for the diamonds.
You can do it how you wish its your tag......it's fun to play
and just see what you can come up with your ideas.
23. When your happy with everything, merge all layers.
24. I now added a white 1 pixel border,
then a 5 pixel using the background color I used.
25. Then added the foto frame one more time.
Same as before but change the frame size to 3
and the matte to 0
Add your water mark, and name or anything else.
Your now done, and ready to share your work of art.
Would love to see what you do with this.
Thank you for giving my tutorial a try.
I do hope you have enjoyed this tutorial, and learned
something new.
Have any questions or need help.
Just let me know, I'm always happy to help any way I can.
Jcuttlebear01@aol.com
Hugs
JoAnn
Another way I did this tag.
Thank you ladies for trying my tutorial.
All are members of my list....
JoAnn's Awesome Brats!
Sample by
ameripex97 aka Kay
Sample by
ggmom9 aka Mary
Sample by
Fairladi101 aka Pati

No comments:
Post a Comment