


Tutorial by Jcuttlebear01 aka JoAnn
3/31/2011
I do these tutorials for fun and not
for any profit. I use them also as a learning tool to
help others learn the fun and art of paint shop pro.
All things I use are collected, the only thing I claim
Is the tag I make with these as my work.
This tutorial is written with the idea you
have some knowledge of PSP.
This was done in PSP 9 but should work with any.
Plug ins
Filters unlimited HERE
Graphic plus HERE
Texture is Grain long deep
Place it in your texture folder.
Open a graphic of choice, o
ruse the one that is in my supplies.
Filters unlimited HERE
Graphic plus HERE
Texture is Grain long deep
Place it in your texture folder.
Open a graphic of choice, o
ruse the one that is in my supplies.
Tubes, and accents of choice
Font of choice
I used Edwardian Script ITC
Mask of choice
My supplies I used are HERE
1) Duplicate your graphic by hitting shift D
on your key board,
or by going to image and re size.
Close the original graphic.

2) Pick 2 colors from your graphic you want to use.
foreground color.>#bace75
background color>#396a11
3) Image>add border>3 pixel any color that
isn't in your graphic.
4) Magic wand tool and click on the border you just
foreground color.>#bace75
background color>#396a11
3) Image>add border>3 pixel any color that
isn't in your graphic.
4) Magic wand tool and click on the border you just
did, and flood fill with the gold patter of choice.
5) Selection invert>effects 3D cutout

Deselect
7) Image>border>3 pixel with back ground color.
8) Image>border 3 pixel with a different color
magic wand and flood fill with the gold pattern.
Deselect.
9) Image>add border 20 pixel background color
Select>effects texture
 10) Filters unlimited>glass frame 3
Settings I used>frame size 25, shading 100
you can play with the settings to get the look you want.
11) Filters>graphic plus>Quick tile 1 with default settings.
Deselect
12) Repeat steps 3 thru 8
13) Image>40 pixel border background color>
New raster layer>select>and flood fill with
white or color you want your mask to be.
14) Layer>new mask layer>new mask from image>

15) Layers>merge group.
If you want the mask to show up more
just duplicate it a couple of times.
Close background>Merge all visible layers.
add drop shadow to the mask layer
Keep selected
16) filters unlimited>Glass frame 1
Frame size 50>Contract 100
Deselect
17) Image 3 pixel border color of choice>select
flood fill with the gold pattern.
Deselect
18) Image 3 pixel border background color.
19) Add tube of choice
re size if you need to and move it to where you want.
I re sized by 60 percent, then took the
eraser tool and got rid of what I didn't want hanging over
into the frame.
20) Add a drop shadow to the tube
use the same as before.
21) Add the ivy to the corner if you wish
resize by 45> add same drop shadow.
22) Layer duplicate>image mirror.
If your happy with everything
Merge all layers.
23) Add any thing else you wish at this time
Add water mark
Save as a jpg and your ready to share
your wonderful work of art.
Would love to see what you do with this.
Thank you for giving my tutorial a try.
I do hope you have enjoyed this tutorial, as much
as I did writing it, and learned something new.
Have any questions or need help.
Just let me know, I'm always happy to help any way I can.
Jcuttlebear01@AOL.com
example below made by me
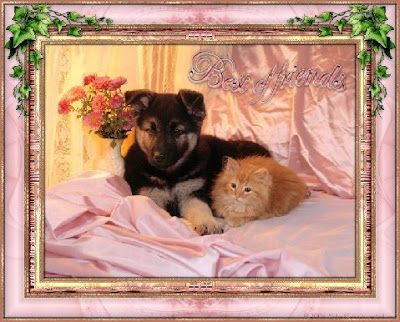
THANK YOU
DreamsRmaid

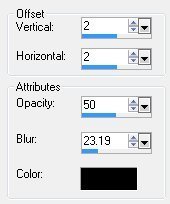
5) Selection invert>effects 3D cutout

6) Repeat but change the V and H to -3
Deselect
7) Image>border>3 pixel with back ground color.
8) Image>border 3 pixel with a different color
magic wand and flood fill with the gold pattern.
Deselect.
9) Image>add border 20 pixel background color
Select>effects texture

Settings I used>frame size 25, shading 100
you can play with the settings to get the look you want.
11) Filters>graphic plus>Quick tile 1 with default settings.
Deselect
12) Repeat steps 3 thru 8
13) Image>40 pixel border background color>
New raster layer>select>and flood fill with
white or color you want your mask to be.
14) Layer>new mask layer>new mask from image>
15) Layers>merge group.
If you want the mask to show up more
just duplicate it a couple of times.
Close background>Merge all visible layers.
add drop shadow to the mask layer
Keep selected
16) filters unlimited>Glass frame 1
Frame size 50>Contract 100
Deselect
17) Image 3 pixel border color of choice>select
flood fill with the gold pattern.
Deselect
18) Image 3 pixel border background color.
19) Add tube of choice
re size if you need to and move it to where you want.
I re sized by 60 percent, then took the
eraser tool and got rid of what I didn't want hanging over
into the frame.
20) Add a drop shadow to the tube
use the same as before.
21) Add the ivy to the corner if you wish
resize by 45> add same drop shadow.
22) Layer duplicate>image mirror.
If your happy with everything
Merge all layers.
23) Add any thing else you wish at this time
Add water mark
Save as a jpg and your ready to share
your wonderful work of art.
Would love to see what you do with this.
Thank you for giving my tutorial a try.
I do hope you have enjoyed this tutorial, as much
as I did writing it, and learned something new.
Have any questions or need help.
Just let me know, I'm always happy to help any way I can.
Jcuttlebear01@AOL.com
example below made by me

THANK YOU
DreamsRmaid

