
Tutorial by Jcuttlebear01 aka JoAnn
12/16/2009
I do these tutorials for fun and not
for any profit. I use them also as a learning tool to
help others learn the fun and art of paint shop pro.
I don't claim to make any of the accents or graphic used
In my tags, they are snagged and collected.
Supplies used:
Template 93 by Ali Here
Beautiful scrapbook kit is new from Lynn Earwicker and you
can get it here or Here
I did this tutorial in psp 9
Graphic of choice
Tubes of choice
Plug in used
Filters unlimited Here
Super blade pro Here
Eye candy 4 Here
Ok lets get started
Open you psp and if need be, install the plug ins.
Find the graphic, and tubes you want to use.
Open them in psp and minimize them for now.
Download and open the template in your psp, duplicate and close the original.
Delete layer 7
Find a paper or color you want to use for raster 1. I used paper #12 from the kit.
Select raster 1 and copy and paste it into the selection.
Deselect.
Select raster layer 8 and use another color or paper for the frame part, I used
paper #10 for this layer.
Keep selected and go to effects filters unlimited and give it this
 Deselect
Select raster 2 and copy and paste your graphic you want to use.
I found a tall one works better then a small one.
I used one that is 664 X 540
Deselect
Select raster layer 4 and copy and paste the same color, you used
on the other frame or pick a different one. Its all up to you.
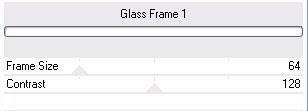
Give it the filter unlimited Glass frame effect.
I changed my frame size and the contrast
 Deselect
Select raster 3 flood fill it with a green, I used
#314313 deselect.
Select raster layer 5 I used paper #13 copy and paste it
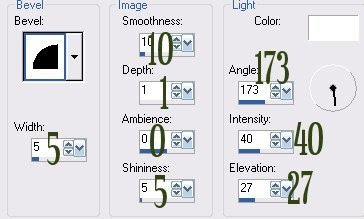
into the selection. Keep select and 3D inner bevel
Select raster 6 copy and invert.
Flood fill with a color of choice.
I used a dark blue from my graphic.
only the center part will show the color.
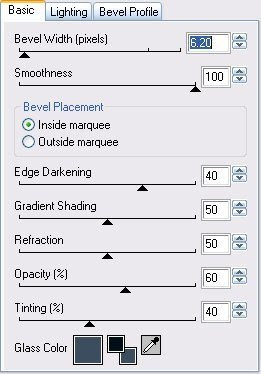
Eye candy glass
setting snow and these settings.
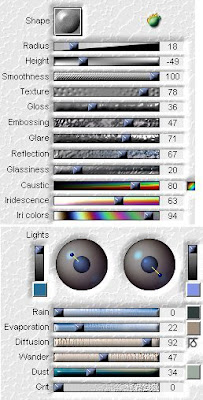
Then I added super blade pro with these settings.
Color is cheep gold and a blank which is in your environment and
texture folder for super blade pro.
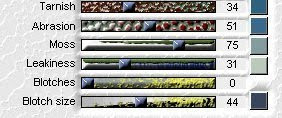
Once your happy with what you see deselect.
This is what I have so far.
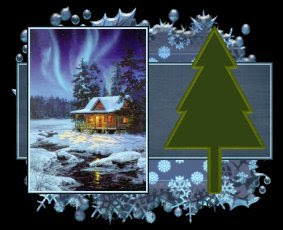
Now your ready to add your accents.
I used some of the packages that were in the kit and resized them 15 percent.
Added a star from the kit and other things.
To the tree.......when all finished added your accents.
and are happy with it then merge all layers.
Add your water mark and your ready to save your finished tag.
Would love to see what you do with this.
Thank you for giving my tutorial a try.
I do hope you have enjoyed this tutorial, and learned
something new.
Have any questions or need help.
Just let me know, I'm always happy to help any way I can.
Jcuttlebear01@aol.com


No comments:
Post a Comment