
Tutorial by Jcuttlebear01 aka JoAnn
8/17/2009
I do these tutorials for fun and not
for any profit. I use them also as a learning tool to
help others learn the fun and art of paint shop pro.
All things I use are collected, the only thing I claim
Is the tag I make with these as my work.
Feel free to share my tutorials, but link them back
to my site please.
Supplies needed
Template HERE
Supplies I used HERE
Graphic of choice
Filters Unlimited HERE
Font of choice
PSP 9
or any other will work.
Open Template
Shift D to duplicate it, close the
original.
Delete the copy write layer
Frame 3 and frame 3 background.
1. Clip on the circle 1 layer and activated it.
Flood fill with color of choice, from your graphic.
Selection and none......or ctrl + D
2. Clip on circle 2 and make it active.
Flood fill with another color of choice from your graphic.
Add some texture to this layer, I added eye candy 4, weave
with these settings.
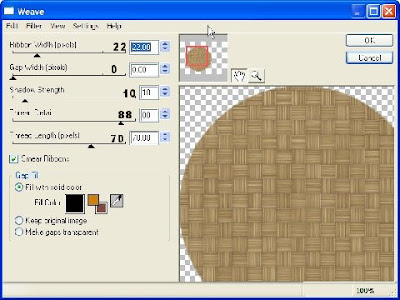 Settings
Canvas apply and if happy with what
you have then deselect
3. Add a drop shadow to this layer.
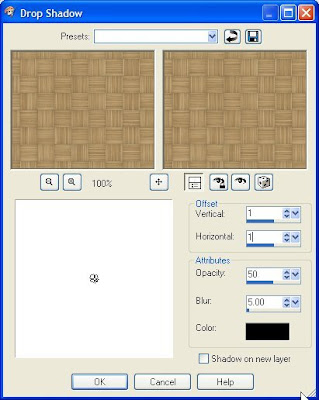 4. Repeat but this time change the V, and H to -1
5. Activate the rectangle layer 1 and add outer bevel to this one.
I used the same color I used for circle 1
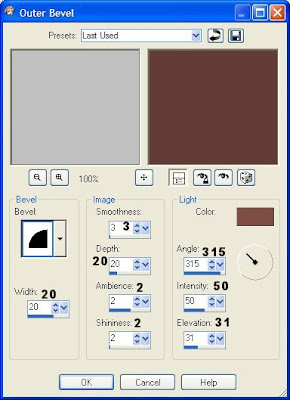 Ok and Deselect.
6. Select and activate rectangle 2
Flood fill with a color of choice.
If you wish you can add a different texture to this layer,
it is all up to you.......I used filter unlimited paper texture,
rag paper.
deselect
7. Select and activate rectangle 3
and flood fill it with color of choice.
You can add a texture to this layer also.
Play around and see what you like.
I added filters unlimited paper texture Papyrus.
Deselect
8. Add a drop shadow to each of the last 2 layers.
I used
-1, 1, 50 and 5 color black.
9. Activate the rectangle back
and copy and paste your graphic
into the selection.
10. Selection float and add a cut out.
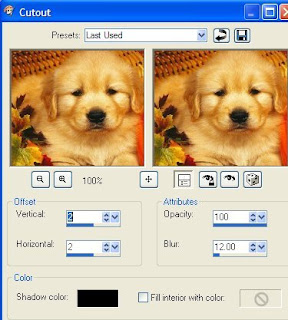 repeat but change the V and H to -2
Deselect
11. Select and activate the frame layer
Flood fill with color of choice.
12. Add the same weave as you did in step 4.
13. Add the same outer bevel, as in step 5.
If your happy with it then deselect.
14. Add same drop shadow as you did earlier in
step 8.
15. Close off your background layer and if your happy
with everything you see, then layer, and merge all visible.
This is what I have so far.
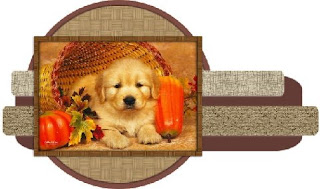
You can now add any accents you wish to add.
Add water mark and your ready to save your work of art.
Would love to see what you do with this.
Thank you for giving my tutorial a try.
I do hope you have enjoyed this tutorial, and learned
something new.
Have any questions or need help.
Just let me know, I'm always happy to help any way I can.
Jcuttlebear01@aol.com
Here is another one I made.


No comments:
Post a Comment