


Tutorial by Jcuttlebear01 aka JoAnn
8/20/2009
I do these tutorials for fun and not
for any profit. I use them also as a learning tool to
help others learn the fun and art of paint shop pro.
All things I use are collected, the only thing I claim
Is the tag I make with these as my work.
Feel free to share my tutorials, but link them back
to my site please.
Be sure and save often in case your psp closes.
This is a very simple and fun tutorial to do.
No outside plug ins used.
Supplies needed
Supplies I used HERE
Font of choice
PSP 9
or any other will work.
Ok lets get started......open your psp of
course.....te he silly me.
1. Open a new image 500 X 500
 Now find the tubes you want to use and open them in psp,
minimize them to the bottom will use them in a minute.
Pick a color from your tube that you want to use for the background.
I'm using.......#a23f17 and #e69866 for my foreground.
 1. Flood fill your new image with the background color.
2. Copy and paste your tube you want to use as a new layer to your new image.
Resize the tube if needed......I resized this one by 75 percent.
3. Layer duplicate

4. Go to your layer pallet and close the copy of the tube
off we are going to work with
the original now click on the raster 2 make sure it is the one your on.
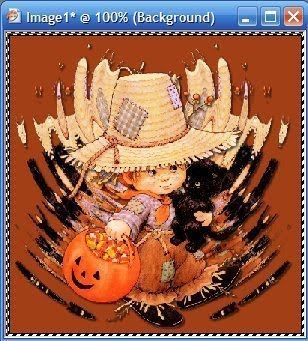
5. Go to effects and distortion.......Ripple effects these are the settings I used.
You can play around and see what you like best lots of different ways of doing this.
If you don't like what you see remember edit undo is your best friend in psp.

Now this is what you should have.
Yours might look different if you didn't use the tube I sent.

6. Layers duplicate this layer......then image and mirror.......take your mover tool
and set these how you want them.
Once you have them placed you can now x out raster 1 and merge visible layers.

 7. Now un x both layers and move your tube where you want it.
8. Add a drop shadow to the back ground and the tube now if you wish.
Effects......3d.....drop shadow........

9. If happy with what you have we will now crop this all down to make it smaller......
Get your
 and draw a square
around your image be careful not to get in to close to your work........
you will have little nodes around it that you can pull it in or
out depending on how you want it to look.
Now go to the tool bar and look for the

and just
click on that and it will resize. Yours should now look close to this.
You got rid of all extra background you don't need.

10. Layers merge all visible.
We will now add a little border.......go to image add border,
a message might open just say yes.

repeat using a different color, size 3, now got your
selection tool, and click on the second border
and go to effects and edge enhancer. Then up to selection and none and
that will kill the ants that are running around. Now add another border
size 2 using first color you used.......Now
you can leave it or add another border size 10 and use
your magic wand......and go to effects and texture effects and blinds......
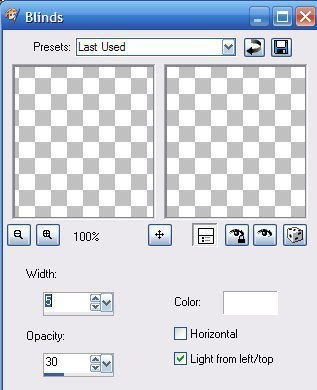
Selection none.......then add another border
size 2 in your first color and your done.
Add water mark and your ready to save your work of art.
Would love to see what you do with this.
Thank you for giving my tutorial a try.
I do hope you have enjoyed this tutorial, and learned
something new.
Have any questions or need help.
Just let me know, I'm always happy to help any way I can.
Jcuttlebear01@aol.com
Here is my finished tag........
 More examples I made.


No comments:
Post a Comment