I do these tutorials for fun and not
for any profit. I use them also as a learning tool to
help others learn the fun and art of paint shop pro.
Supplies
Scrapbook kit is is the wonderful work by
Whisper Softly Designs
kit is called Gloria's Valentine you
can find it Here
Plug ins:
Eye candy 5 texture Here
Filters unlimited Here
I used psp 9 for this tutorial.
Can be done in other versions.
Lets get started.
1. Open a new image 500 X 400
2. Pick a color from your tube you want your
background to be. I used #af1b4b
Flood fill your new image with that color.
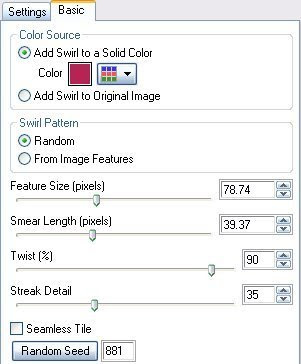
3. Effect plug in eye candy 5 texture swirl
You can change the setting and the color to your liking.
This is what I used

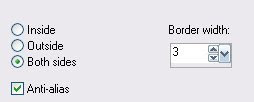
4. Selection tool and custom settings
Its the one there by itself.

 5. Layer new raster layer.
Flood fill with a gold pattern of your choice.
I used the beads.
Deselect.
6. Take your mover tool and move this frame to where you want it.
I moved down to lower right hand corner.
7. Select inside the frame, expand by 2
Layer new raster, find a paper of choice from the kit
and copy and paste it into selection, move down.
I used paper 8.
Deselect.
8. Add a couple tube or one of choice, copy and paste it
as a new layer, you want it below the frame.
Re size to your liking.
Keep in mind if your going to add any wording you need to leave room.
9. Next add any accents you wish to use.
I used things from the kit.
10. I added a bow and re sized it 10 percent
then used deform tool to get it how I wanted it.
11. Next I took one of the bears from the kit, re size 10 percent
placed it where I wanted it.
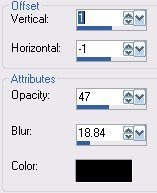
Added a drop shadow
 12. Add balloons re size 10 percent
use deform tool to get them how you like them.
I took my eraser tool and removed part of the ribbon I didn't want.
When happy with it add your drop shadow.
13. Add the candles, re size them 7 percent.
Place them how you want them.
Add a drop shadow.
14. Add a dove re size it to 10 percent.
Then I mirrored it, I used just one.
Add drop shadow, then duplicate mirror.
Re size this one to 50 percent.
Place where you want it.
15. Add anything else you wish.
When your happy with the way it looks.
Merge all layers.
16. Crop your tag to get rid of any empty space around the edge
you want removed.
I re sized all layers down to my liking
350 X 295
17. Add a 3 pixel border white, activate it.
and flood fill with the gold pattern.
deselect
18. Add a 2 pixel border of your background color.
19. Add a 3 pixel border white, and activate it
and flood fill with the gold.
deselect
20. Add a 10 pixel border background color.
activate it and give it the same swirl pattern
as in your background.
21. Add filters unlimited glass frame one,
default setting, or a bevel of choice.
Add your water mark and we are all done.
Save your work of art and your ready to share it.
Would love to see what you do with this.
Thank you for giving my tutorial a try.
I do hope you have enjoyed this tutorial, and learned
something new.
Have any questions or need help.
Just let me know, I'm always happy to help any way I can.
Jcuttlebear01@aol.com
another way I did this


No comments:
Post a Comment