Tutorial by Jcuttlebear01 aka
JoAnn
3/4/2013
I do these tutorials for fun and not
for any profit. I use them also as a learning tool to
help others learn the fun and art of paint shop pro.
All things I use are collected, the only thing I claim
Is the tags I make with these as my work.
Feel free to share my tutorials, but link them back
to my site please.
Remember to save often in case
your psp closes.
I did this in PSP 9 but sure you can
do it with other
versions.
Plug in
Phoxo its a stand alone and no
need
to install it. Just download it and
click on the install
icon, and it will put a short cut on your
desk top.
All kinds of neat effects in there. The
bottom icon is what it
looks like, and the top one is the one
you will see on your desktop.
It is a free stand alone plug in
Supplies
Graphic of choice
Font of choice
Word art
Tube
Accents
Open a graphic of
choice
The one below is what I'm going to
use
Duplicate>close the
original........Save the copy as>and place where you
can find it. Open up the PhoXo plug
in>this is what you will have in the one tool bar.
If you change the font you get all kinds
of different effects.......and the size can be
changed also.......play around its
fun.
Then this tool bar over by the question
mark is the effect button. There are many different
things in there but we are using the
glass tile effect. Click on it
and this box opens up>you can adjust
the slider
to how you want the effect to
look.
Save as and you can now close this plug
in>open what you saved back
in your PSP
This is what mine looks
like.
Copy and paste as a new layer the graphic
you have the copy of
on the background.
Get the mask you want to use>I'm using
20-203
Merge group>and move this down toward
the bottom of your back ground
or where ever you like it the
best.
Add a drop shadow
You can use a color from the graphic if
you wish
or one of choice.
On the background layer
Draw a rectangle out not to
large
I used a rounded
one>promote selection to layer
On the promote Layer>adjust>Blur
Selection>select>border
Add a new raster layer>flood fill with
color of choice.
Effects 3D inner bevel
Deselect
With magic wand click on the inside of
the frame>
Copy and paste as a new layer>the tube
of choice.
With mover tool move it over into the
frame>
Resize as needed>On the lady I used
resized her by 80 percent
Selection.>invert and hit delete on
the key board.
Deselect
Layer arrange move down
How my layer pallet looks
Add a drop shadow of choice to the
tube.
Layers>merge down twice and give this
a drop shadow
Repeat and change the V n H to
-2
add a new raster layer>add words of
choice.
or brushes
Add drop shadow
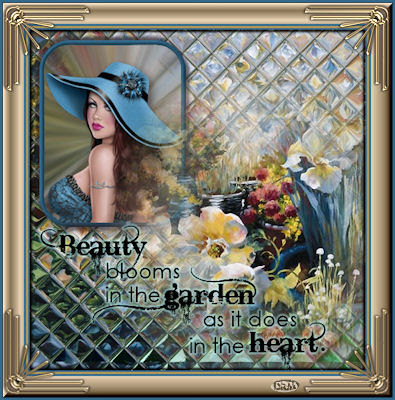
Arrange everything the way you want
it>then merge flatten
Add a 2 pixel border color that isn't in
the background
Select with magic wand and flood fill
with the color you used
in the frame.
Select invert>effect 3 D cut
out
Repeat and change the V and H to
-3
Deselect
Add a 5 pixel border color of
choice.
Add a 2 pixel border with
white>select>and flood fill with the
color you used
earlier
Deselect
Add a 20 pixel border the same color you
did the 5 in
Add any accents you wish to at this
time
I added corners.
Add your water mark
And your now ready to save your work of
art.
Would love to see what
you do with this.
Thank you for giving my tutorial a try.
I do hope you have enjoyed this tutorial, and learned
something new.
Have any questions or need help.
Just let me know, I'm always happy to help any way I can.
Jcuttlebear01@aol.com
Thank you for giving my tutorial a try.
I do hope you have enjoyed this tutorial, and learned
something new.
Have any questions or need help.
Just let me know, I'm always happy to help any way I can.
Jcuttlebear01@aol.com
Thank you dreams>aka Jessica


No comments:
Post a Comment