


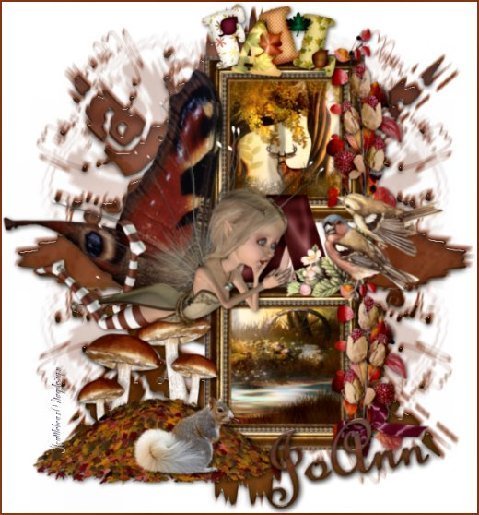
Tutorial by Jcuttlebear01 aka JoAnn
12/4/2011
I do these tutorials for fun and not
for any profit. I use them also as a learning tool to
help others learn the fun and art of paint shop pro.
Everything I use I have collected don't claim to have
made anything other then the tag.
Notes:
All settings will remain the same unless otherwise noted
This tutorial assumes you have a working knowledge of PSP
Remember to save often in case your psp crashes.
I did this in PSP 9 but sure any one will work.
Poser fairy tube I used is the work of

The art work I used can be found HERE
It's the wonderful work of Jaguar Women
Scrap kit I used, is called Autumns Blush TS (babycakes)
and you can grab the kit HERE
Be sure and visit her blog also
Supplies
Graphic of choice-I placed 3 in the supplies
Font of choice
Tubes of choice
Preset for eye candy 5 glass
Mask of choice
All are in the supplies
Plug ins
Eye candy 5 impact HERE
Filters unlimited>&Bkg Kaleidoscope HERE
Import the bkg kaleidoscope into your filters unlimited.
Install the eye candy 5 impact, and import my preset into,
the eye candy glass
Open new image 800 X 900
Copy and paste to your new image>BCS Double Frame
Click in the center of one of the frames>selection
expand by 10>New raster layer
This is the graphic I'm using, It is in the supplies.

On your graphic your using>take your selection tool
and take a selection from the graphic, you want to add into
your frame. Edit>copy>paste as a new layer.
Layers>arrange move down.
Deselect
Back on your frame layer,
repeat those same steps for the other frame,
but pick a different part of the graphic for it, or use a
different graphic.
Merge visible if your not going to add any thing inside of the frames.

Pick so leave accents for the edge of the frame.
I'm using bcs_branch, copy and paste as a new layer
Resize by 45%
Image>mirror and move over to the right side of your frame.
You can take your deform tool, and turn it like you want it.
I set it to free hand so I could push and pull it like I wanted.
I then used the eraser tool, and took off some of the stem.
I also took a couple leaves off I didn't want in to my graphic.

Add a drop shadow

Duplicate that layer and move down on the other frame.
Add bcs_berries resize by 35% image mirror> take and move it up and on the
leaves, take deform tool set back to scale, I pushed in on the sides
so they looked better on the leaves
eraser tool and get rid of part of the stem that hangs way down.
Add drop shadow
Layer duplicate move down on the other set of leaves.
If you want you can image mirror this so it sits different
then the other one.

If your using the same bird tube as I did
2_birds copy and paste as a new layer>resize by 70%
Move over between the top and bottom frame over by
the leaves, take deform tool and turn it some.
Add drop shadow.

If your happy with what you have
merge all visible layers.
Resize this by 90%>move it over to the
right of you work area some.
Next we will add>bcs_leaf_pile>resize by 50%
Move down to the bottom left side of the frame
Add drop shadow
Add>bcs_shrooms resize by 20% move over at the top
of the leaf pile>layer arrange and move down.
Add drop shadow>Layer duplicate and mirror
and move it over some.

Add squirrel>resize by 40%>image mirror
add drop shadow, and place him on the
leaves and over by the edge of the frame.

Add the posser fairy>image mirror
place her on top of the first set of mushrooms, next to the frame.
and turned her some with the deform tool
Add drop shadow.

I decided I didn't want the bow up on top of the top frame
so I used selection tool and got rid of it.
That is where I placed the fall words.
resize them by 50%
add drop shadow.
Add a bow at the bottom of your frame to cover the
branches over on the right if you would like to.
Resize to the size you would like, I went down to 30%
and turned it with my deform tool.
Add drop shadow.
If your happy with every thing now, merge all visible layers.
Resize by 90% crop off some of the extra
around your tag. Resize again by 90%
Now we will add the mask
Add new raster layer>pick a color you want to use
for the mask. Flood fill>layers arrange send to bottom.
Layers>new mask layer>from image

merge group>resize by 95%
Filters unlimited>&@BlueBerry Pie
hit apply
Effects>distortion>spiky halo

Duplicate the mask layer>on the original adjust motion blur

On the other layer add>
Effects>'eyecandy5 impact glass jcuttlebear01 preset is
in the supplies, or one of your liking.
Raster new layer add your water mark.
You can now add your name or any thing else you want
it is totally up to you.
When your all done merge all layers>crop off any extra you don't want, and
resize all layers to your liking.
Save your image, and your now ready to share your work of art.
Would love to see what you do with this.
Thank you for giving my tutorial a try.
I do hope you have enjoyed this tutorial, and learned
something new.
Have any questions or need help.
Just let me know, I'm always happy to help any way I can.

No comments:
Post a Comment