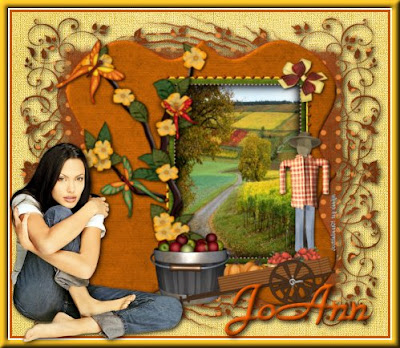
Tutorial by Jcuttlebear01 aka JoAnn
10/8/2009
I do these tutorials for fun and not
for any profit. I use them also as a learning tool to
help others learn the fun and art of paint shop pro.
All things I use are collected, the only thing I claim
Is the tag I make with these as my work.
Feel free to share my tutorials, but link them back
to my site please.
Supplies
Graphic of choice
Tubes of choice
Or the ones I used
HERE
You can find the scrapbook kit here.
It's a free one.
Lacarolita_Fall
HERE
And the template I used is HERE
#34
PSP 9
Is what I used for this tutorial.
Find a graphic you wish to use.
1. Open the template and duplicate, and close the original.
2. Delete all layers except for these

These are the ones we will be using.
3. Activate the background layer
Resize it by 95 percent.
Selection all and float, get a paper you
want to use for the background and copy and paste it into the selection.
I used paper 3, afloat then add an inner bevel to this color.....#eed876
if you use the same background as I did.
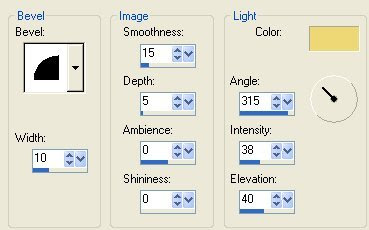 Deselect
4. Activate layer 1, and get selection tool, and click on it,
selection modify contract by 3, then selection modify,
selection, select border
 5. Then find a paper or color you want to use for this frame part,
I used paper 10 and copied a pasted it into the selection,
now give it the same bevel as before, then deselect
6. Make layer 7 active and select all and selection float,
find a paper you want to use, I used paper 6, copy and paste
into the selection, the give it the same bevel as before.
deselect
7. Activate layer 5 and click on it, then copy and paste the
graphic into the layer you wish to use.
Then selection, float now effects 3D
cut out
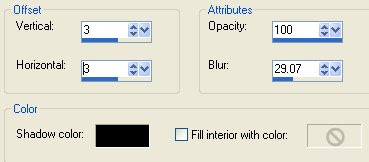
8. Then reapply and change the V and H to -3
Deselect
9. Activate layer 1 and click on the inside that is still gray there and
add a color you want for the contrast on the frame part.
I used paper 7, then copy and paste into the selection,
then add the same bevel as before.
Deselect
10. Activate layer 7 and give it a drop shadow effect.
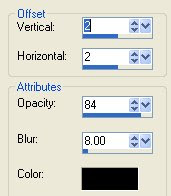
11. Then close off your back ground layer and merge
visible, reopen the back ground.
This is what I have so far.
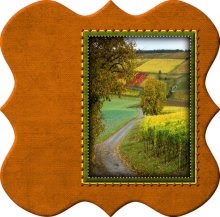
12. Now add some flowers I used
Flower 3 and resized it by 50 percent.
Then copied and pasted as a new layer.
Then mirror image, I then took my selection tool and cut off the part of the
flower that hung over on the picture,
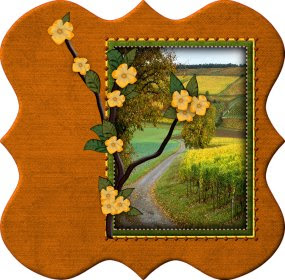
13. Now copy and paste your flower once more.....
Take and move it below the merged layer
Resize it to about 45 percent, now take eraser tool and get
rid of anything you don't want to have showing.
I took my deform tool and turned mine some and pulled it out a bit
so it went like I wanted it to.
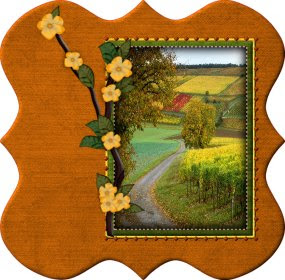
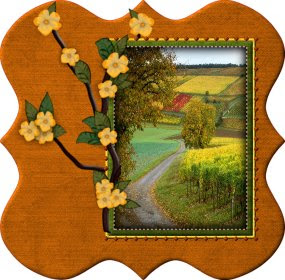
14. Then add a couple butterflies to the flowers.
Resize them to 15 percent and I mirrored one so they
weren't all going the same way.
15. Add the same drop shadow to the flowers and the butterflies as before.
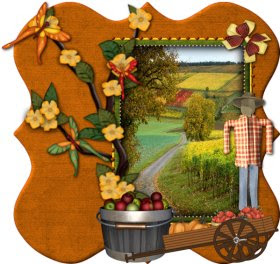
16. Add the scarecrow that is in the kit resize him by 30 percent and move him over to the right, give
him the same drop shadow.
17. Add the apple barrel and resize it by 15 percent add the same drop shadow
18. Add the wagon and resize it by 30 percent, and give it the drop shadow also.
19. Find a bow you want to use and resize it to 10 percent and move it to the right hand
top corner. Then I took my deform tool and turned it how I wanted it.
This is mine so far..........if your happy with it then merge all layers
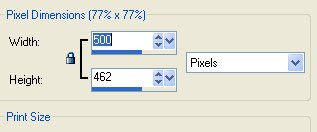
20. Now resize your image, not all layers just the graphic part.
This is what I went down to.
21. Add a new layer and send it to the bottom
Find a paper you want to use for the mask part
I used paper 2
I used babe designs mask 13
22. I then duplicated the layer a couple of times so it was darker, and
can be seen easier.
Then merge all layers.
Add a drop shadow to this now.
23. Add a new layer move it to the bottom
selection all, and copy and paste a paper you want
to put into there for a background
I used paper 5
Deselect
24. Crop your image now to get rid of the extra there you don't want in your tag.
Then add a 3 pixel border color of your choice.
25. Add a 2 pixel border of white
26. Add a 10 pixel border I used a color from my background.
Select then add the same bevel as before.
Deselect.
27. I now added my lady tube to this.
I resized her by 50 percent and mirrored her.
Then gave her the same drop shadow as before.
We are now done.......add your watermark
And merge all layers
You can now add a name or anything else you want to this.
If your happy with it then time to save your work of art.
Would love to see what you do with this.
Thank you for giving my tutorial a try.
I do hope you have enjoyed this tutorial, and learned
something new.
Have any questions or need help.
Just let me know, I'm always happy to help any way I can.
Jcuttlebear01@aol.com


No comments:
Post a Comment