
Tutorial by Jcuttlebear01 aka JoAnn
10/21/2009
I do these tutorials for fun and not
for any profit. I use them also as a learning tool to
help others learn the fun and art of paint shop pro.
All things I use are collected, the only thing I claim
Is the tag I make with these as my work.
Feel free to share my tutorials, but link them back
to my site please
Supplies
Template 37 HERE
Scrapbook kit HERE
Called My lady bug it's a free one on her site.
Both template and scrapbook kits are the wonderful
work of Lacarolita's Designz
Ones I used are HERE
Tube of choice
Graphic of choice.
No plug in's used in this tutorial
PSP of your choice, I did this one in 9
1. Open the template and make a copy of it and
close the original.
2. Delete all the layers except for these
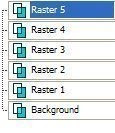 3. Make your background layer active,
resize it down to 90 percent. Click on the outside of the layer
and then you will go to selection and invert. Then delete keep selected.
4. Pick a color from your tube your going to use or you can add a paper of choice
from the kit.
I used a red from the tube I'm using.
Deselect
5. Effects and texture weave.
You can add something different if you wish it's fun to play around.
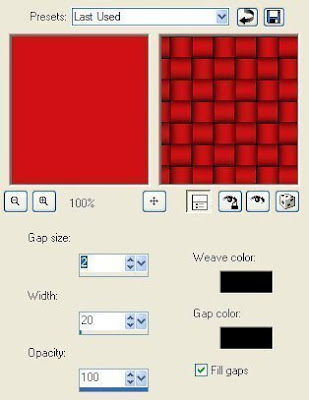 6. Activate layer 1 and select it
copy and paste your graphic into selection.
Deselect
7. Activate layer 2 and click on it and copy and paste a paper
you would like to use for the frame. Copy and paste as a new layer,
invert and hit delete one time to get rid of the extra.
Deselect
8. Effects 3D inner bevel.....settings I used
9. Close off all layers except for layer 1 and your graphic you added,
merge them......then reopen the others.
10. Activate layer 3 and click on it, and you will need to do both sides of this layer,.
Then copy and paste as a new layer another paper of choice, or you can
just flood fill with a color of choice.
I used paper 1
11. Then selection invert and hit delete one time.
Deselect ......I used this bevel for this layer
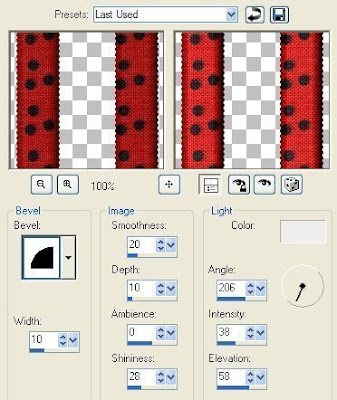
12. Activate layer 4 now and copy and paste another paper you
wish to use I used paper 2,
as a new layer, and
Once again invert and hit delete
Deselect
Add a bevel to this layer.
13.
Activate layer 5 and copy and paste another paper,
I used paper 3, . Do like last step.
14. Now you can close off the merge layer and the background and
merge these layers together, you should only have 2 merged layers and
the background remaining.
15. Take your mover tool and move the layers how you want them to look.
Now we are ready to add some accents.
I used the lady bug leaves, resized them to
50 percent. Then move them down just above the background layer.
Then image flip.
Activate your deform tool and turn them how you want them.
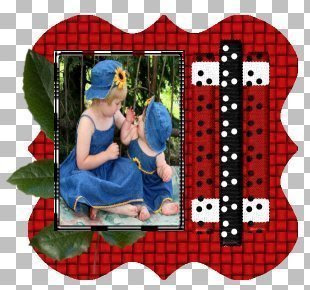
16. Then I duplicated it and image mirror then flip
I then took my eraser tool and removed anything I didn't want to show.
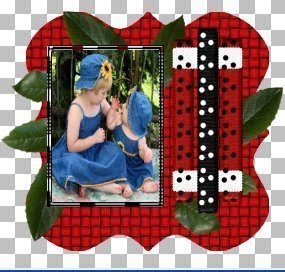
17. Add lady bug flower 5 and copy and paste it to your work,
and resize it to 20 percent if it's not your top layer now,
make sure you bring it up there, and move it to the left hand corner
of the frame, you can take your deform tool and turn it how you like it.
18. Then duplicate this layer, and image flip and mirror move to the top right hand corner.
What I have so far.

19. Get the tube you want to use and copy and paste it to your
work as a new layer resize as needed, I went to 60 percent on this one.
Place it how you want it.
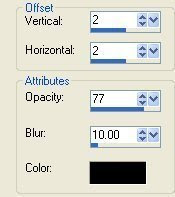
20. Add a drop shadow if you wish
21. Now add the rest of the accents you want on your tag,
I used Butterfly 2 and resized it to 15 percent.
And placed it on the flowers.
22. Then a added a couple of the lady bugs.
I resized them to 10 percent and used the deform
tool and turned them and placed them how I wanted.
23. I also added the red ribbon in the one corner.
24. If your happy with everything you can merge all layers now.
25. I added a 1 pixel white border
26. Next a 5 pixel border of black
27. And a 5 pixel border of red.
28. Selection and all modify contract by 15 Invert and add the same bevel
as before if you wish.
29. Now add any wording, name and your watermark and
your ready to share your work of art.
Would love to see what you do with this.
Thank you for giving my tutorial a try.
I do hope you have enjoyed this tutorial, and learned
something new.
Have any questions or need help.
Just let me know, I'm always happy to help any way I can.
Jcuttlebear01@aol.com


No comments:
Post a Comment