Tutorial by Jcuttlebear01 aka JoAnn
8/31/2010
I do these tutorials for fun and not
for any profit. I use them also as a learning tool to
help others learn the fun and art of paint shop pro.
Everything I use I have collected don't claim to have
made anything other then the tag.
Notes:
All settings will remain the same unless otherwise noted
This tutorial assumes you have a working knowledge of PSP
Remember to save often in case your psp crashes.
I did this in PSP 9 but sure any one will work.
Scrap kit is by Wicked Princess and
is now a free to use you can get it HERE
No plug ins needed for this tutorial.
Supplies:
HERE
Tube of choice
Mask gabeemask22
Fall graphic
Font of choice
I used LHF Goldsmith Script
Place your mask into your mask folder.
Open your tubes you are going to use.
Minimize them for now.
Graphic of choice or the one in
the supplies.
Open new image 700 X 600
Selection tool, draw out a square
not to big but how ever large you want it
for your frame.
Selection> modify>Select Selection border

Add a new raster layer>flood fill with color
or copy and paste a paper from the kit, I used WP_SIF_PP1.jpg
Deselect
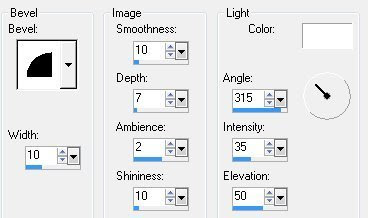
Effects 3 D inner bevel

Magic wand and click inside the frame.
Select>modify expand by 4
New raster layer>copy and paste graphic
of choice into selection.
Layer arrange move down.
Deselect
Make the frame layer active, click
on the inside of it, then go down to the graphic
and selection>float
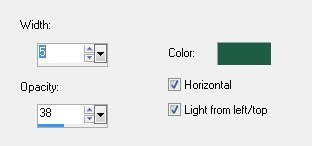
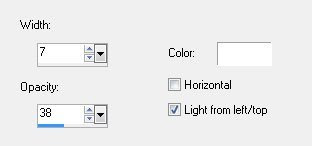
Effects 3 D>Cutout
 Repeat change the V N H to - 2
Deselect
Go back up to the frame layer>layers merge down.
Copy and paste as a new layer
the ivy from the kit WP_SIF_IVY1.png
Move down below the frame
Erase any part that shows that you don't
want there.
Add a drop shadow

Duplicate>image mirror
Arrange with mover tool how you want it.
Layer merge down
Copy and paste as a new layer
WP_SIF_LEAFBRANCH.png
Resize about 50 percent
Rotate 90 degrees to the left>duplicate
image flip>place them how you want them
then layer merge down>add drop shadow.
Layer duplicate mirror
Layer duplicate and rotate it
90 degrees either way don't matter
move it to the top of the frame.
Layers merge down when your happy
with how the leaves look around your frame.
Add wheat tube move it how you want.
Resize by 30 percent. Take deform tool and
pull it out how you would like it to look.
Add drop shadow
Move down until its just under the frame.
Add a bow of choice or one from kit WP_SIF_BOW4.png.
Resize it by 50 percent, I took eraser tool and got rid of some
of the bow that hung down into the picture.
Add drop shadow.
Sun flower of choice or one from the kit
WP_SIF_FLOWER17.png resize by 20 percent
move up onto the bow.
Drop shadow
Add fairy tube and place her in the
corner resize it by around 70 percent.
Add drop shadow
Add your word art resize by 50 percent.
add drop shadow, arrange how you want it.
Bottom layer>select all
Flood fill with a color from your graphic>
or copy and paste a paper of choice into selection
I used from the kit WP_SIF_PP9.jpg
deselect
Layers>load saved/mask>load mask from disc.
 Layers>merge group
I wanted it darker so I duplicated it.
Then merged down.
Inner bevel same as before.
Drop shadow same except change the color
I changed it to a green from the mask.
Adjust>brighten and contrast>Clarify by 5.
If your happy with the way it looks now
Merge all layers
Add a new layer>add your water mark and your ready
to share your work of art.
Would love to see what you do with this.
Thank you for giving my tutorial a try.
I do hope you have enjoyed this tutorial, and learned
something new.
Have any questions or need help.
Just let me know, I'm always happy to help any way I can.
Jcuttlebear01@aol.com
Ones below are made by other talented
members of my list.
Thank you ladies.