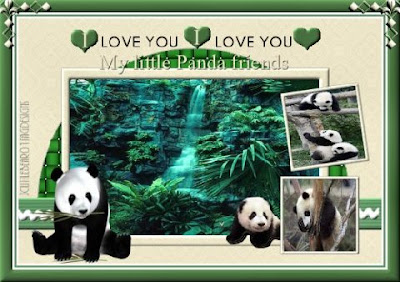
 Tutorial by Jcuttlebear01 aka JoAnn
8/17/2010
I do these tutorials for fun and not
for any profit. I use them also as a learning tool to
help others learn the fun and art of paint shop pro.
All things I use are collected, the only thing I claim
Is the tag I make with these as my work.
This tutorial is written with the idea you
have some basic knowledge of PSP.
This was done in PSP 9 but should work with any.
Supplies:
3 graphics of choice.
Tubes of choice
Font of choice.
Everything I used HERE
Open the template we are going to use, shift D on key board and make a copy
of the template. Close the original.
On the layer pallet delete the copy write we don't need that.
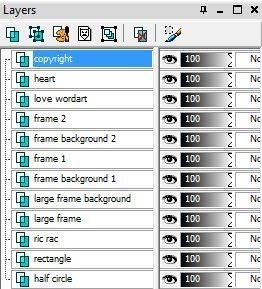 1.) on your layer pallet high light the half circle.
2.) Magic wand tool>click on the half circle on the template we
are working on.
3.) Flood fill with the background color.
Deselect
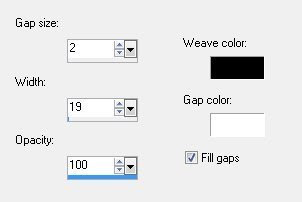
4.) Effects Texture effects>Weave
5.) Highlight in you layer pallet the rectangle.
Magic wand and select it. Flood fill with a nice color
from the graphic. I used> #74a773
Deselect
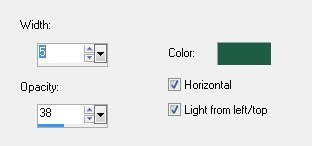
6.) Effects>texture>blind effect
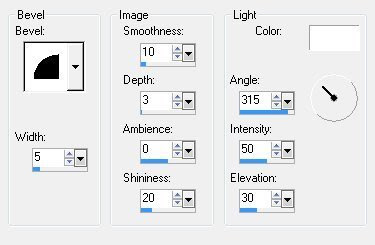
7.) Inner bevel
8.) Layer pallet and highlight ric rac next.
Selection all>selection float>selection de float>
Selection modify expand 2>flood fill with a color of choice.
I'm using white.
Deselect
9.) Add same bevel as before, its saved in your settings.
10.) Highlight the large frame background>Click on the
center with magic wand>Keep selected>Highlight in the layer
Pallet the Large frame layer>selection>float>de float and hit delete
on your key board one time.
Deselect
11.) Magic wand click in the white frame there with the magic wand.
Flood fill with a pattern, or a color of choice.
Deselect
12.) Inner bevel same as before.
13.) Layer Pallet>highlight the large frame background.
Click on the center with magic wand.
and delete that layer.
14.) Selection>Modify expand by 4>add a new raster layer> Copy and paste
a graphic into the selection.
Deselect.
15.) Layers arrange>move down.
16.) Frame 1 background select with magic wand.
Copy and paste into selection another graphic of choice.
Deselect.
17) Select frame 1 with magic wand and flood fill with color of choice.
Deselect
Add same inner bevel as before.
18.) Select frame 2 background and copy and paste another graphic
of choice into the selection.
Deselect.
19.) Select frame 2 with magic wand and flood fill with color of choice.
Deselect
Add same bevel.
20.) Its up to you if you want to use word art or not.
I did and this is how I did it.
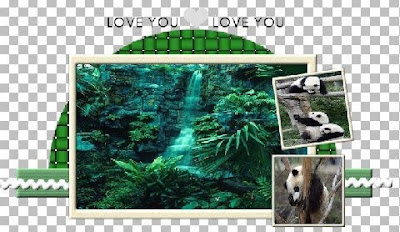
Move with mover tool up above the half circle, along with the heart.
This is what I have so far.
21.) Select the heart and flood fill with a color of choice.
Deselect
Add same bevel as before.
22.) Font tool>settings I used

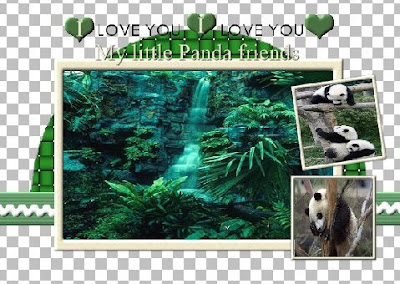
I typed the letter I and placed it on the heart. Layer convert to raster layer.
Then I typed>My little panda friends
Place how you want it>Layer convert to raster layer.
Its up to you.
I also duplicated the heart and placed it where I wanted it.
22.) You can now add tubes you wish to use.
I added a couple little panda bears to it.
23.) Had to resize them to 40 percent to make them look right.
The one little bear, I moved him down until he was under the edge of frame 2.
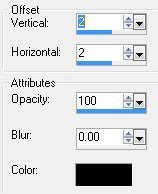
24.) add a drop shadow
25. Add the other bear, or one of choice.
I mirrored him.
Resize to 40 percent> move him where you want him.
Add the same drop shadow.
26.) If your happy with the way it looks now
then merge all visible layers.
27.) Crop your image so that some of the extra
around the edge is gone.
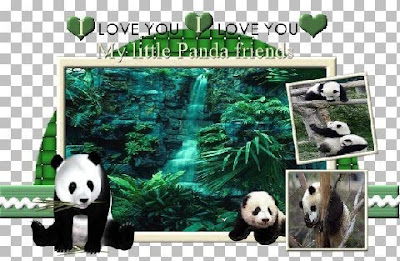
28.) Add a new raster layer>layer arrange>send to bottom.
Flood fill with a background color of choice, or a pattern.
29.) 3 Pixel border color of choice, I used white.
30.) 3 pixel border background color or color of choice.
31.) 3 pixel border make it the first one you used.
32.) Add a 20 Pixel border second color of choice.
Select with magic wand and
Add same bevel as earlier>except change the width to 10.
Deselect.
You can add a couple of corner accents if you wish or any thing else at this time.
Add a new raster layer and add your water mark.
Your now ready to save and share your work of art.
Yippee your all done.
Would love to see what you do with this.
Thank you for giving my tutorial a try.
I do hope you have enjoyed this tutorial, as much
as I did writing it,
and learned something new.
Have any questions or need help.
Just let me know, I'm always happy to help any way I can.
Jcuttlebear01@aol.com
Another one I made


No comments:
Post a Comment