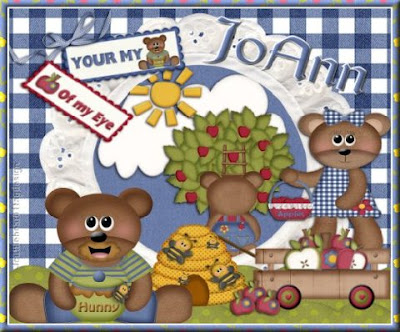
Tutorial by
Jcuttlebear01 aka JoAnn
2/23/2010
I do these for fun and as a learning tool.
I don't sell or make a profit from any of the
supplies I have collected. Or from writhing these tutorials.
Scrapbook kit is the awesome work of Kristi you can get this darling
it is called Bears Bees n Apple Trees
kit HERE
No outside plug ins used for this tag.
Font I used Gaelic Regular Here
I did this tutorial in PSP 9
but sure any would work.
Some knowledge of PSP is helpful.
OK lets get started
1) New image 600 X 500
2) Pick a frame from the kit
I'm using frame
kristiw_bearsbees_frame5
3) Copy and paste to your new image...
re size it by 50 percent.
4) Get your magic wand and select the inside of the frame.
Selection modify expand by 7.
5) Pick a paper you want to use for your back ground.
I'm using...kristiw_bearsbees_p2
copy and paste as a new layer, selection invert.
Hit delete on your key board....layer arrange move down.
deselect.
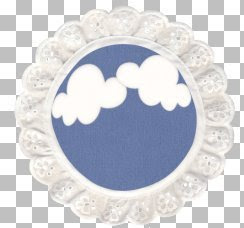
6) I added kristiw_bearsbees_cloud
copy and paste to your work layer arrange, down
you want it below the frame.
7) Re size by 50 percent......I used my deform tool
to get them how I wanted them to look.
Place them how you want them.
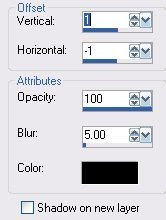
 8) Add a drop shadow, these are the settings
I used, can reduce if you want.
 9) Add kristiw_bearsbees_sun
Re size it by 30 percent and place how you want it.
add same drop shadow.
10) I added kristiw_bearsbees_tree next re sized by 35 percent
Layer arrange and move down place where you like it best.
Add a drop shadow
11) Add the ladder and re size it by 35 percent place
by the tree.
Add kristiw_bearsbees_bear4
Re size by 30 percent I placed him like he is climbing the ladder.
Add same drop shadow.
12) Add kristiw_bearsbees_scallop2
Re size 80 percent don't worry about the over hang
will be gone when we re size tag.
Duplicate and arrange like you want.
add same drop shadow.
This is how it looks now.
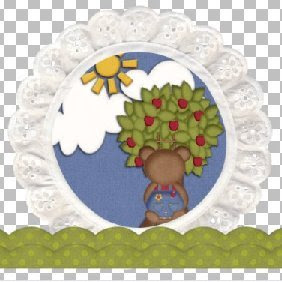
12) Add kristiw_bearsbees_beehive re size by
30 percent I moved him below the bear.
Add same drop shadow.
13) Add kristiw_bearsbees_bee re size by
30 percent place him where you want.
Duplicate mirror and I took deform tool and
adjusted like I wanted.
Add as many as you wish.
Drop shadow as before.
14) Add kristiw_bearsbees_bear3 and re size it
same drop shadow.
15) Add the wagon re size by 45 percent
add drop shadow.
add some apples to your liking.
16) Add a bear of choice......this is the one I'm using
kristiw_bearsbees_bear2 and
Copy and paste to your work
Layer arrange bring to top.
Re size by 50 percent.
Place the bear where you like him.
add drop shadow.
17) Get a paper you want to add for the background
I'm using kristiw_bearsbees_p7
copy and paste as a new layer.
Layer arrange move to bottom.
18) Crop your tag and get rid of anything you don't want
around the edge of it.
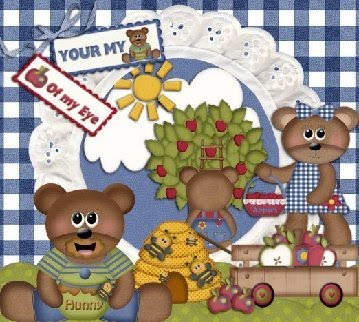
19) When your happy with the way everything looks then merge all
layers. This is what mine looks like now.
20) Add a 2 pixel border of choice, I used white.
21) Add a 10 pixel border color doesn't matter, selection tool
and copy and paste a paper into it.
I used kristiw_bearsbees_p14
Add a bevel to this.

22) Deselect and your now ready to add your water mark.
Then save and share your work of art.
Would love to see what you do with this.
Thank you for giving my tutorial a try.
I do hope you have enjoyed this tutorial, and learned
something new.
Have any questions or need help.
Just let me know, I'm always happy to help any way I can.
Jcuttlebear01@aol.com


No comments:
Post a Comment