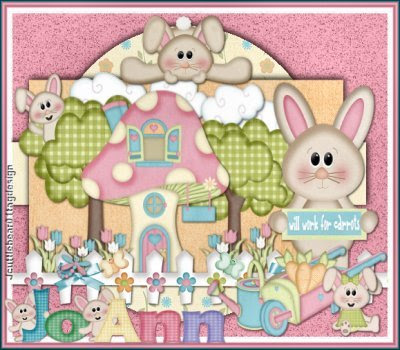
 Tutorial by
Jcuttlebear01 aka JoAnn
2/26/2010
I do these for fun and as a learning tool.
I don't sell or make a profit from any of the
supplies I have collected. Or from writhing these tutorials.
Supplies:
Template I used is number 37 by
Kristi and you can get it
Here
Scrapbook kit is the awesome work
of Kristi Westling is called Sweet Spring and you can find it
Here
Open your template and make a copy
Shift D on your keyboard close original.
delete the top layer there.
The Butterflies if you don't want to use them.
I never used the words either.
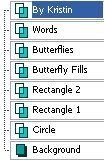 1. Highlight the circle layer. Then selection tool and make
it active. Get a paper you wish to use for the circle.
This is the one I'm using kristiw_sweetspring_p7
Copy and paste as a new layer, selection invert,
and hit delete one time on key board.
2. Highlight the circle layer and delete it.
Deselect.
3. Add a drop shadow
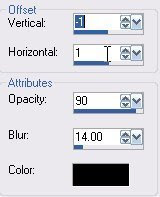 4. Highlight Rectangle 1
Activate it with your selection tool.
Get another paper you wish to use for it.
this is the one I'm using kristiw_sweetspring_p3
Do the same as in step 1.
Deselect.
5. Use same drop shadow as before.
6. Highlight Rectangle 2
Activate it with your selection tool.
Get another paper you want to use.
this is the one I'm using kristiw_sweetspring_p5
Do the same as in step 1.
Deselect
7. Add same drop shadow as before.
Now we will add some tubes.
8. Add kristiw_sweetspring_cloud
Duplicate as many as you wish.
You can arrange them after you place some of the other
tubes so you know how you want them.
9. Add this drop shadow to all tubes.
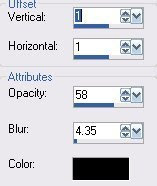
10. Add kristiw_sweetspring_tree1 re size by 35 percent
Arrange how you want it.
Add same drop shadow.
Move tube over to the left.
11. kristiw_sweetspring_tree2
Re size by 35 percent
Place it how you want it.
Add drop shadow
12. I added kristiw_sweetspring_house
Re sized it by 35 percent.
Place how you want it.
Add drop shadow.
I used my deform tool and pulled it out and up like
I wanted it.
13. Add kristiw_sweetspring_tulip3
I added all 3 to give more color.
Re size the tube by 15 percent
And any where else you might want some.
Add drop shadow to all of them.
14. Add kristiw_sweetspring_fence
Place it how you want it.
Cut off with your selection tool any part you don't want.
Add drop shadow
15. Add kristiw_sweetspring_bug1and
kristiw_sweetspring_butterfly1
I used my deform tool and moved them how I wanted them.
16. Add kristiw_sweetspring_bunny1 place him up on the
top of the rectangle 2
Re size by 30 percent.
Add drop shadow
17. Add kristiw_sweetspring_bunny4
re size to 50 percent.
Add drop shadow.
18. Add kristiw_sweetspringwateringcan1
re size it by 15 percent.
Add same drop shadow and move it over to the right side.
I mirrored mine.
Add same drop shadow.
19. Add kristiw_sweetspring_cart and re size it 25 percent move it
over to the right and down some, see my finished tag.
Add same drop shadow.
20. Add some carrots if you wish into the wheel barrow
re size them 25 percent.
This is how mine looks so far.
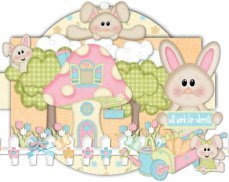 Add anything else now that you wish to.
22. Now I highlighted the background and
flood filled with a color from one of the tubes.
23. I then went to filters unlimited and gave it
a paper effect. I gave it a mineral limestone.
That is all up to you.
24. Add a 3 pixel border color of choice.
25. Add a 10 pixel border color of choice.
26. Add a 3 pixel border first color, or one of choice.
Filters unlimited and give it a glass frame 2
adjust the size how it looks best to you.
27. Add a new raster layer, and add your water mark.
Re size all layers how you would like it.
We are now finished and ready to save you work of art.
Would love to see what you do with this.
Thank you for giving my tutorial a try.
I do hope you have enjoyed this tutorial, and learned
something new.
Have any questions or need help.
Just let me know, I'm always happy to help any way I can.
Jcuttlebear01@aol.com


No comments:
Post a Comment