


 A big thank you to
Sassyann3250718 aka Annie
for being my inspiration for this tutorial.
Tutorial by
Jcuttlebear01 aka JoAnn
5/23/2009
Have any problems feel free to E-Mail me
with the questions, I will be more then happy to help you out.
All graphics and tubes I use are collected.
These tutorials are to be used as a learning tool only.
Don't intend to break any copy writes here.
I need help with Tutorial
if link don't work for you its
Jcuttlebear01@aol.com
Be sure and put dnd and what tutorial so I will know.
Anyone can do this.
Things you will need
Graphic of choice
PSP I'm using 9
Supplies HERE
Plug ins
Filters unlimited 2 HERE
Eye candy 5 Impact HERE
OK lets get started.
1. Open graphic of choice and make a copy of it, close the original.
2. Pick a color for your background and your foreground from the picture your using.
I'm using for my background #70522e
And this is my foreground color #a27f55
3.. Get the
 and go and make a small square of what you would like
for your accent in the border........then go edit copy and paste as a new image.
Minimize for now we will use it later.
Then selection and none.

4.. Add a new raster layer
5. Get your selection tool again and change it to eclipse.

Go to your graphic and draw around you item you want to use.
Be careful not to get to close to the edge.....
Hint.......
If you have trouble look down at the bottom of the psp and you will see the numbers
saying how large your picture is, take and divide the first number which on mine its

Now you can use your ruler if its easier for you find that in view and ruler.
Start at 240 across then top move your mouse down until it says 180 then click on the mouse and
drag it out. Hold you mouse button down until you get it like you want.
That's how you find the center of the picture or pretty close to it.
Once you get it like you want you can get rid of the ruler.
 6. Now merger all layers and invert, then hit your delete key
one time.
Selection and none.
7. Get your magic wand tool and click on the outside of your graphic and
then selection invert........now go selection modify and use these settings,
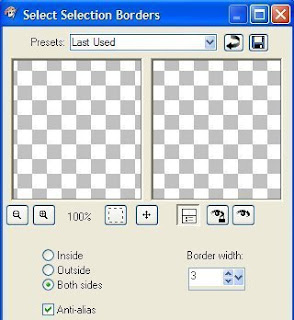

then click OK.
Now you will have 2 sets of ants running around your graphic......
add a new layer and flood fill with a gold or color of your choice.
Make sure when you do the flood fill your on the top layer, not the merged layer
when happy with it you can add a bevel if you wish.
I used eye candy 5 Impact bevel
Settings tab
Flat edge small
Then basic set to these

Bevel to your liking

Selection none if your happy with it then merge all layers.
You can use just the 3 d inner bevel if you wish.....it's all up to you.
8. Add a new raster layer, then flood fill it with your background color, then
layers arrange and send to bottom.
Make sure you are on the bottom layer for the next 2 steps.
9. Now go to effects, and filters unlimited, special effects 1
I used the default, but you can click on random until you see
something you like then click OK......now remember if you don't like it
edit undo and do it again..........don't start over.
10. Now filters unlimited and buttons & frame glass frame 2. and just get it,
where it touches the picture you don't want it to go in to far......I used 17 and 128
Play around until your happy. Then merger layers.
11. Add a 2 pixel border make sure its a color that isn't on the frame part.
Then get magic wand and click on the new border, and flood fill with the gold pattern.
Then selection and none.
13. Add a 25 pixel border now click on it with magic wand, then the pattern we
saved early go find it in your pattens and set to your liking.
I set mine to......0 angel, and size 100. Then flood fill the border with that pattern.
14. Then filters unlimited and add the same glass frame as before, I used the default
setting this time.......play around tell you get what you want.
15. Add another 2 pixel border, then selection, all, and modify, contract by 2 then invert.
This is a little trick to keep from bleeding threw to your other colors, it comes in handy
a lot of times.
Flood fill with the gold pattern then kill the ants......selection and none.
16. Add another 2 pixel border your background color.
17. Your ready to add corners or accents of any kind that you want to add.
When you have finished and like everything merge all layers.
Add your water mark and a name or anything you wish.
Re size and sharpen after you re size. Now your ready to save and share.

another example I did.
 Do hope you found this tutorial helpful.
Please share with me what you do, would love to see.
Thank you so much for giving my tutorial a try.
Hugs and God Bless

No comments:
Post a Comment