Twirl tag
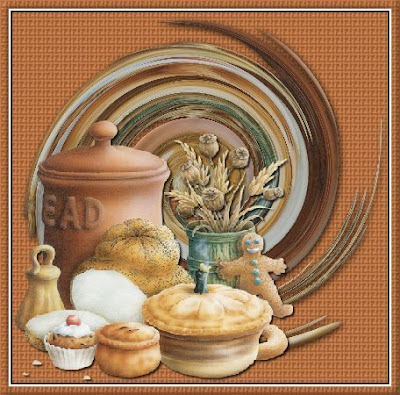 This is what we will make today.
Hope to see you guys give this easy one a try.
I'm still learning how to write tutorials so bare with me.
Need help just ask......
Tutorial by Jcuttlebear01
Supplies here
or
Tube of choice
PSP of course silly me....lol
No plugs in needed for this one.
Ok lets get started.
1. Open a new image go to file and new image.
I like to work with a large size, we can resize later.
No plugs in needed for this one.
Ok lets get started.
1. Open a new image go to file and new image.
I like to work with a large size, we can resize later.
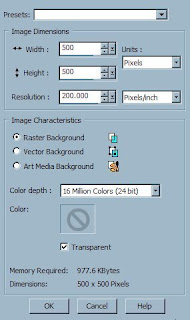
2. Find the tube you want to use. Open it up in psp and copy and paste to the new image.
Resize the tube if you need to. I resized this one by 85%, Then go to layers and duplicate it.
3. On your layer pallet make sure you have the first one highlighted. It should say raster 2.
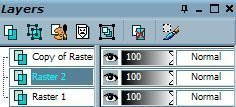
4. Go to effects and distortion effects, and twirl
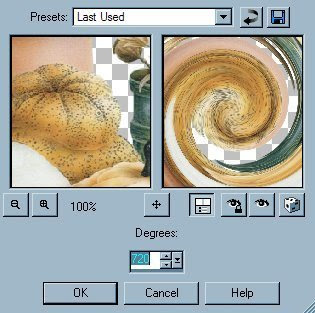
You can play with the setting and get different efforts if you want to, 720 is what I used.
5. Go to effects and 3D inner bevel.
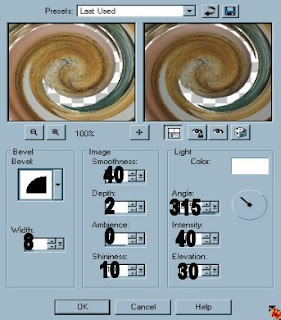
6. Effects and drop shadow with these settings.
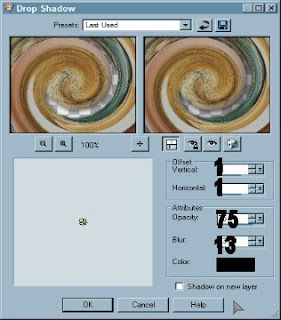
7. Now click on the top layer on your layer pallet to make it the active one and resize that tube,I went to 75%, you want it so you can see the background. Then get your mover tool
and move the tube where you want it. Remember if you don't
like something edit undo, don't have to start all over.
Now give it a drop shadow of choice.....I used the same setting except change blur to 5.
If your happy with it so far then go to layers and merge all visible.
8. Now take your crop tool.... and draw around your image close to it but not touching the tube part. That will get rid of all the back you don't need. Then go and click on the check mark and it will go down.
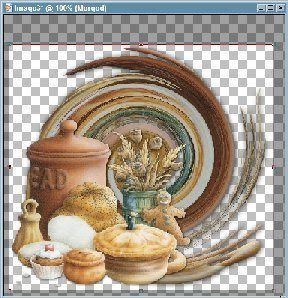 9. Go to layers and add a new raster layer, then layer arrange and send to bottom.
Pick a color from your tube and flood fill the background. Color I used #895735, but it will depend on your tube.
10. Now go to effects, texture effects, and Texture, you decide
what you like in there the best, all kinds of things to use..........this is what I used.
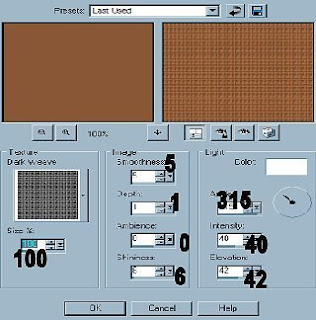 When your happy with this then go to layers and merge.
11. Add a border of choice of color to look good
 When your happy with this then go to layers and merge.
11. Add a border of choice of color to look good
with your tag, I used white size 3,
then get your magic wand and click on the border to make it active,
then get your magic wand and click on the border to make it active,
then go to selection and invert. Then effects 3D cutout
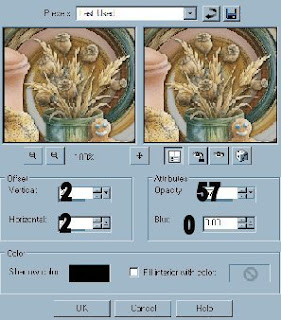
then change the 2 to -2 and redo the cutout. Go to selections and none to stop the ants.
12. Go to image and add another border, I used size 10 and made it a color from my background. Then get your magic wand and make it active and give it the same texture effect. Then to effects and 3D and inner bevel same settings as before. Selections, and none. Your all done.
13. Add a name or any thing else you wish to add to your tag.
If your happy with everything resize it to your liking.


No comments:
Post a Comment