


 6/19/2009
Tutorial by Jcuttlebear01 aka JoAnn
I do these tutorials for fun and not
for any profit. I use them also as a learning tool to
help others learn the fun and art of paint shop pro.
Supplies
Tube of Choice
Font of Choice
I used American bush shame
which I found here.
http://www.fontspace.com/category/4th%20July?p=1
Scrapbook kit of choice
Scrapbook kits
I collected these from not sure where, found them on a disc.
If anyone knows who made these kits let me know so I can give them
the credit, I never made any of these kits.
STARS n STRIP
Red White and Blue
PSP 9 can be done in any PSP
1. Open new image 500 X 500
2. Find a paper you want to use, and copy and paste as a new layer.
3. Find a frame from the kit you want to use,
and copy and paste as a new layer.
4. Click on the inside of the frame and hit delete.
If you have a white background in the center
of it. If you don't then skip this step.
5. Keep selected find another paper and add a new layer,
expand by 4,then copy and paste this
paper into the frame.
6. Layers move down so its below the frame.
Find the tube you wish to use and copy and paste it as a new layer,
Resize it to fit like you wish.
NOTE
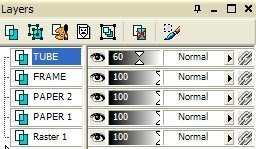
Make sure your on the right layer before you do this.
Need to be on the tube layer.
What I did was use the Mickey mouse tube then
lowered my opacity down until you could see the
frame and used my selection tool, and eraser to
get rid of what I didn't want.
What I did was use the Mickey mouse tube then
lowered my opacity down until you could see the
frame and used my selection tool, and eraser to
get rid of what I didn't want.
I wanted him to look like
he was marching out of the frame.
he was marching out of the frame.
When finished bring the opacity back
up to normal.
up to normal.
BEFORE

AFTER

7. When your happy with the way your frame looks......close off
paper 1 and merge visible layers.
8. Add any accents you wish to this. When happy with
what you have merge all layers.
9. Now resize all layers to your liking, I used my crop tool
to get rid of a lot that I didn't want.
10. Add a 2 pixel border use what you want to go with the background.
11. Add another 2 pixel border and use a different color
12. Add another 2 pixel border of a different color.
13. Add a 15 pixel border, and select it and copy and paste
into the border the paper you used for the background
or one of your choice.
14. Add a bevel to this border this is what I used.

Add your water mark your now ready to save your work of art.
You can add a name or anything else you wish to your tag.
Would love to see what you do with this.
Thank you for giving my tutorial a try.
I do hope you have enjoyed this tutorial, and learned
something new.
Have any questions or need help.
Just let me know,
I'm always happy to help any way I can.

No comments:
Post a Comment