


 Tutorial by Jcuttlebear01 aka JoAnn
6/22/2009
I do these tutorials for fun and not
for any profit. I use them also as a learning tool to
help others learn the fun and art of paint shop pro.
for any profit. I use them also as a learning tool to
help others learn the fun and art of paint shop pro.
Supplies
Plug ins
VM instant art HERE
Eye candy 400 glass HERE
Tube of choice
Font of choice
PSP 9 is what I used, can use any really.
Open new image 600 X 600
1. Copy and paste tube of choice to your new image.
2. Duplicate this layer and close it off
Click on layer 1 on your layer pallet.
 3. Go to effects and apply the VM instant art to this layer
Round and Round
 4. These are the settings I used, you might have to make adjustments on the and one
depending on how you want it to look, so just play around with the settings.
This is how mine looks.
Take with the move tool and move it up toward the top of your image.

5. Layer duplicate, image flip........
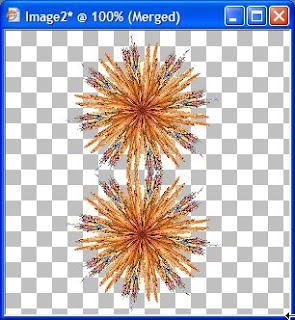
I took my mover tool and moved them a bit closer.....then merge layers.
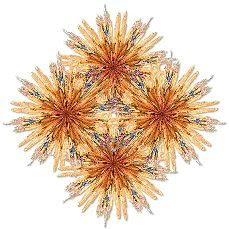
Layer duplicate, image rotate 90 to left or right don't matter.

This is how it should look now or close to it.
If your happy with it then merge all layers.
6. If you wish add eye candy glass to this to give it some highlighting effects.
This is what I did.


Then the bevel was a hump effect.
Went from looking like this to

this
It's all up to you that's the fun of playing.
7. Add a drop shadow to this .

8. Now go to the layer pallet and open up the tube we closed off.
Now the back ground will be larger then your tube so you need to re size it.
I went down to 80 percent, it will be up to you, so it looks right with your tube.
9. Move your tube to where you want it. Then add the same drop shadow as
before. Then merge layers
10. Take your crop tool and get rid of the extra that you don't need around this layer.
11. Layer new layer and flood fill with a color from your tube.
12. Layer move down.
You can a add some kind of effect to the back ground if you wish.
I added eye candy 5 texture weave........it's all up to you.
I just keep playing until I found a pattern I was happy with.
Then I added a 2 pixel border with a color from the tube I used.
Another 2 pixel border with another color.
Then added 10 pixel with the first color selected and added the same effect
I used on the back ground. Then added a bevel of choice.
Add a 2 pixel border of the second color or one of choice.
Add your water mark and anything else you wish.
Hope you have enjoyed doing this fun little tutorial.
If you have any trouble and need help just ask.
Jcuttlebear01@aol.com
Would love to see what you do with this.
Thank you for trying my tutorials.
Hugs and God Bless JoAnn
2 more examples by me


No comments:
Post a Comment