


Tutorial by Jcuttlebear01 aka JoAnn
6/29/2009
I do these tutorials for fun and not
for any profit. I use them also as a learning tool to
help others learn the fun and art of paint shop pro.
All things I use are collected, the only thing I claim
Is the tag I make with these as my work.
Supplies I used HERE
Tube of choice
eye candy 4 HERE
Filter factory F HERE
Filters Unlimited HERE
Font of choice
PSP 9
Open a new image 600 X 500
1. Pick a light color from your tube for the foreground I used #9db16e
and a dark color for you background I used #647c46
2. Add a new raster layer and rename this background, flood fill with
your background color you have picked.
3. Get selection tool, and click on the selection option.

Settings I used......
 you can use what you would like for the tube you use.
3. Selection modify select borders,

4. Add a new raster layer and rename it frame.
Flood fill with the foreground color.
5. Effects eye candy bevel boss


Bevel type is up to you.......play around with it.
I used a curver.
6. Selection and none......click on the border part of the frame.

7. Effects and texture effects~blinds

selection and none.......or another way is to ctrl+D
8. Click inside the frame and find the tube
you wish to use, add a new raster layer
then copy and paste into selection.
9. Close off all layers except for the tube and the frame.
Merge visible layers. Now you can move the frame any where
you would like it to be. Reopen the back ground layer now.
Now your ready to add any accents you wish.
10. I added some Doodle art, which I have included in the supplies.
You can use them or pick some of your own choice.
If you use the ones I used, then you will need to re size them,
down to around 70 percent depending on where you want to place them.
Copy and paste as a new layer. Move down below the frame. and move it
where you wish.
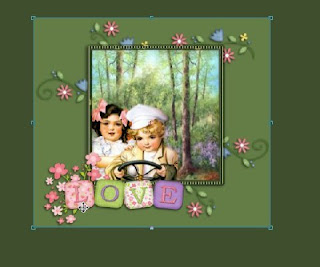
This is what I have so far.
8. Click inside the frame and find the tube
you wish to use, add a new raster layer
then copy and paste into selection.
9. Close off all layers except for the tube and the frame.
Merge visible layers. Now you can move the frame any where
you would like it to be. Reopen the back ground layer now.
Now your ready to add any accents you wish.
10. I added some Doodle art, which I have included in the supplies.
You can use them or pick some of your own choice.
If you use the ones I used, then you will need to re size them,
down to around 70 percent depending on where you want to place them.
Copy and paste as a new layer. Move down below the frame. and move it
where you wish.
This is what I have so far.
 11. Now I added another doodle, to the tag, I decided I didn't want as many
of the flowers showing on the one side so I cut them off of the first doodle there
on the bottom. Then moved the word doodle to where I wanted it.

12 If your happy with the way everything looks then close off the background and
merge visible.
Add a drop shadows.
merge visible.
Add a drop shadows.
 13. Take your
and get rid of the extra back ground you don't need,
make sure you don't get any of your picture.
make sure you don't get any of your picture.
 click on your
it's up in your top tool bar, in psp 9 and it
will take the picture down to where you want it. If not right then
edit undo and just redo it.....you can pull out on the little squares you see
around your picture also if you get to close.
13. Click on your background layer
and go to filter factory F
Add border fade 2
Settings I used
is 17, 1, 144
This is all up to you and how you would
like your tag to look.
14. Take your

and click on your merged layer and bring it
in so it's not touching the border.
15. Click on the inside there in the background and
you can add a texture if you wish.
I added Filters unlimited special effects 1 and just
played until I got something I liked. It is all up to you.
When it's like you want it you can now
merge all layers.
Your ready to add your Water mark
You can also add a name or anything else you wish.
Re size your tag to what you want.
Now your ready to save it.
Would love to see what you do with this.
Would love to see what you do with this.
Thank you for giving my tutorial a try.
I do hope you have enjoyed this tutorial, and learned
something new.
Have any questions or need help.
Just let me know, I'm always happy to help any way I can.
Jcuttlebear01@aol.com
Hugs
Another Example by me


No comments:
Post a Comment